



A single frozen pipe can lead to thousands in water damage repairs. Most freeze damage does not happen because RV owners are careless. It happens because temperatures drop quickly, water is left inside the plumbing system, and small gaps allow heat loss overnight.
The good news is that preventing RV freeze damage is completely manageable. With a clear winterization process and the right freeze protection steps, you can protect your RV water system, tanks, valves, and fittings before freezing temperatures arrive.
This guide walks through exactly how to prevent RV freeze damage, whether you are storing your camper or actively camping in a cold climate.
Understanding RV Freeze Damage
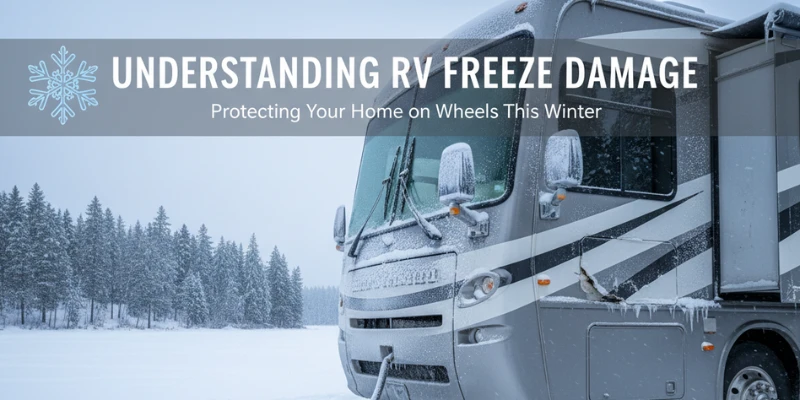
According to the RV Industry Association, seasonal maintenance and winterization are essential for protecting RV plumbing systems in cold climates. As it turns to ice, it expands. That expansion creates internal pressure inside your plumbing system.
That pressure can crack pipes, damage fittings, split a water heater tank, or rupture a freshwater tank. Often, you will not see the damage until temperatures rise and water flow resumes.
Systems Most at Risk
The most vulnerable components include the fresh water tank, gray tank or grey tank, black tank or black water tank, and the water heater tank. RV pipes, water lines, dump valves, sewer line connections, and even the outside shower or shower drain are also at risk.
Even small amounts of water left behind can cause freeze damage.
Critical Temperature Thresholds
Risk begins at 32°F, especially if temperatures remain below freezing for several hours. Below 20°F, freeze protection becomes even more important.
Wind chill increases heat loss around the undercarriage and exterior of your RV. Exposed pipes or tank fittings can freeze faster than you expect, particularly if your furnace is not running consistently.
If you have seen freeze damage before, it usually started with one overlooked area.
Pre-Winter Preparation: Essential Supplies
Before winterizing, gather the right materials and tools. Preparation makes the process efficient and thorough.
RV Antifreeze
Always use RV antifreeze, commonly known as “pink stuff.” It is designed for potable water systems and is safe for your plumbing system.
Do not use automotive antifreeze. It is toxic and can damage components inside your RV water system.
Most travel trailers and camper setups require two to three gallons, depending on plumbing layout and freshwater tank size.
Insulation and Heat Retention
Insulation around exposed water lines helps prevent freezing. Foam pipe insulation, heat tape, and tank heating pads are effective options.
An RV skirt reduces wind exposure to the undercarriage. Window inserts limit heat loss through windows and vents. In a cold climate, these additions make a noticeable difference in protecting your RV.
Required Tools
You may need a water pump converter kit, compressed air to clear lines, and basic plumbing tools. Knowing where your drain valves, fittings, and low-point drains are located saves time during winterization.
Complete RV Winterization Process
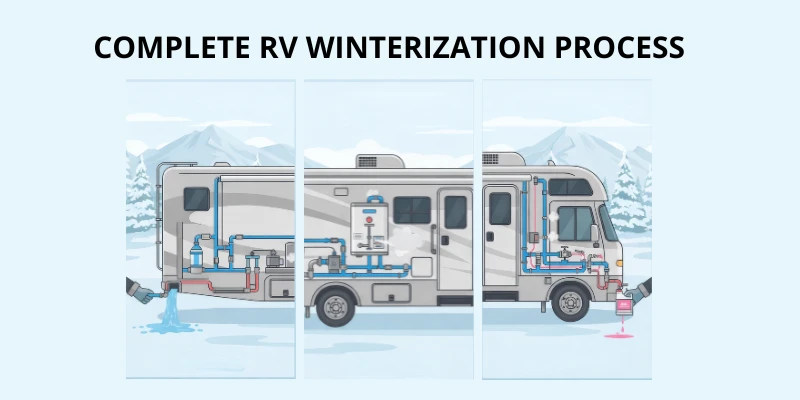
A full winterization protects every part of the plumbing system.
Drain the Fresh Water Tank
Locate the drain valve and empty the fresh tank completely. Any water left inside can freeze and crack the tank.
Close the valve securely once drained.
Empty the Gray Tank and Black Tank
Open the dump valves and drain both the grey water tank and black water tank fully. After draining, close the valves to prevent cold air from entering through the sewer line.
Drain the Water Heater Tank
Turn off propane and disconnect shore power to the heater. Allow the water heater tank to cool before removing the drain plug.
Completely draining the tank prevents internal splitting during freezing temperatures.
Clear All Water Lines
Use compressed air to blow out RV pipes and water lines. This removes trapped water in fittings, faucet connections, and the water pump.
After clearing lines, pump RV antifreeze through the system. Open each faucet until pink antifreeze flows. Do not forget the shower drain, outside shower, toilet line, and city water inlet.
This step ensures complete freeze protection throughout the plumbing system.
Protecting External RV Components
Freeze damage often begins underneath your RV.
Exposed pipes and fittings should be wrapped with insulation. Heat tape can help prevent freezing in vulnerable water line sections. Follow installation instructions carefully to maintain safe temperatures.
Adding an RV skirt protects the undercarriage from wind chill and stabilizes temperature beneath the living space. This is especially important for RVs parked long-term in freezing temperatures.
Sealing gaps around windows and vents prevents cold air infiltration. Reducing heat loss lowers stress on your furnace and improves overall winterization performance.
Active Protection for Cold Weather Camping
If your RV is not fully winterized and you are actively using the water supply, active heating becomes essential, especially for RVers planning extended stays while living in an RV full-time.
Run your onboard furnace consistently. Many RV systems are designed so furnace heat reaches the holding tank and undercarriage areas.
Monitor propane levels regularly. If the furnace shuts off overnight, pipes or tank components may freeze before morning. Use a heated RV water hose if you’re using city water.
Otherwise, disconnect the hose after filling the fresh water tank to prevent freezing.
Tank heating pads provide additional protection for a water holding tank during extended cold weather.
A small electric space heater can help maintain living space warmth, but it should not replace your furnace for plumbing protection.
Common Mistakes That Lead to Freeze Damage
Freeze damage usually results from small oversights, not major neglect. The most common issues include:
- Water left in the water heater tank
- Forgetting to clear low-point drains
- Ignoring the outside shower
- Leaving dump valves open in freezing temperatures
- Assuming mild daytime temperatures will offset overnight freezing
Even one of these can lead to cracked pipes, damaged fittings, or hidden water damage once temperatures drop.
Final Thoughts: Protecting Your RV with Confidence
Preventing RV freeze damage is about planning ahead and following a complete winterization process. When you understand how freezing temperatures affect your pipes, water lines, and tanks, protecting your RV becomes straightforward and practical.
For landowners exploring hosting RV travelers on private land, preparation is just as important. Clear expectations around winterizing, shore power access, water supply use, and plumbing care protect both the RV owner and the property itself. Platforms like Hookhub provide that structure by connecting responsible RVers with prepared landowners, supported by clear systems, expectations, and coverage that reduce risk during freezing seasons.
For official cold weather preparedness guidance, you can review safety recommendations from the National Weather Service.
Winter protection is not about reacting to damage. It is about protecting your RV before temperatures drop. With proper freeze protection, your RV stays safe, your systems remain intact, and your next season begins without costly repairs.
FAQ
At what temperature does an RV water system risk freeze damage?
Risk begins at 32°F, especially during prolonged exposure. Temperatures below 20°F significantly increase the likelihood of frozen pipes or tank damage.
Can holding tanks freeze?
Yes. A gray tank, black tank, or freshwater tank can freeze if water is left inside and exposed to freezing temperatures. Proper draining and RV antifreeze prevent this.
Is RV antifreeze necessary if I blow out the lines?
Blowing out lines removes most water, but RV antifreeze adds protection in fittings, traps, and low-flow areas where water may remain.
Will my furnace prevent frozen pipes?
In many RVs, the furnace directs heat toward the undercarriage and holding tank area. However, consistent propane supply and insulation remain essential in extreme cold.