


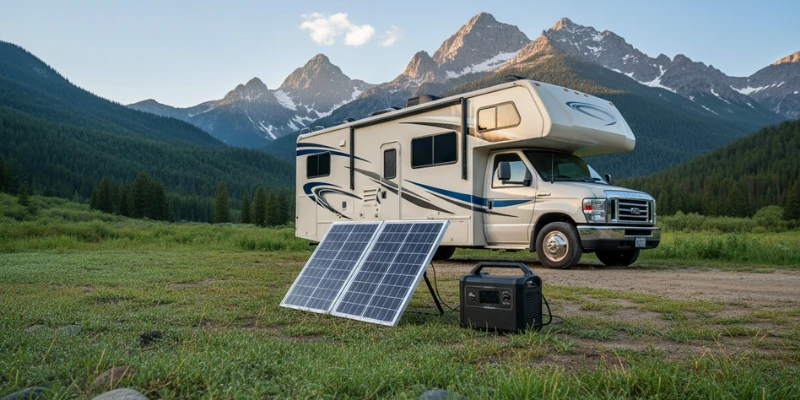
Imagine powering your RV without relying on shore power or running a noisy generator.
A properly designed RV solar panel system lets you charge your batteries, power your appliances, and enjoy off-grid camping with confidence. Whether you own a travel trailer, motorhome, or camper, installing solar panels on your RV can transform your RV lifestyle — especially if you enjoy boondocking, dispersed camping, or staying on private land without hookups.
This guide walks you through how solar power works, what components you need, how to size your system properly, and how to install an RV solar setup the right way.
Key Takeaways
- An RV solar panel system lets you power your RV without relying on shore power or a generator.
- A complete RV solar setup includes solar panels, a charge controller, a battery bank, wiring, and an inverter.
- Calculating your daily watt usage determines how many solar panels and how much battery capacity you need.
- Lithium batteries provide longer life and better usable capacity than lead-acid options.
- Proper fuse protection, wire sizing, and battery management are critical for safety.
- Running an RV air conditioner on solar is possible — but requires a large battery bank and inverter setup.
How RV Solar Power Works
An RV solar system converts sunlight into usable electricity for your RV’s electrical system.
Here’s the power flow:
- Solar panels collect sunlight.
- Power flows to a solar charge controller.
- The charge controller regulates voltage and safely charges your battery bank.
- Your batteries store that energy.
- 12V DC appliances run directly from battery power.
- An inverter converts 12V DC into 120V AC to power outlets and larger appliances.
Your solar setup integrates with your existing battery, converter/charger, and shore power system. It does not replace them — it supplements them.
Understanding your RV’s electrical layout (12V vs 120V circuits) is critical before installing solar. According to the RV Industry Association, understanding your RV’s electrical system is key to sizing and integrating solar panels safely and efficiently.
The 3 Most Common RV Solar Mistakes Beginners Make
Before we get technical, let’s prevent expensive errors.
1. Undersizing the Battery Bank
People add 400W of solar… but only 100Ah of battery.
Solar doesn’t power your RV — your batteries do. Solar simply recharges them.
2. Overspending on Panels Without Calculating Usage
More panels won’t fix poor energy habits. Start with a watt-hour calculation first.
3. Expecting to Run Air Conditioning Easily
Air conditioners change everything. We’ll break down the real math below.
Step 1: Calculate How Much Solar Your RV Needs
Start by listing your daily power usage.
Common RV appliance wattage estimates:
- LED lights: 10–20W each
- 12V fridge: 40–60W average draw
- Water pump: 60–100W (intermittent)
- TV: 60–120W
- Laptop: 40–90W
- Microwave: 1,000–1,500W
- Roof AC: 1,500–3,500W startup surge
Multiply watts × hours used per day.
Example:
| Appliance | Watts | Hours | Daily Wh |
| Lights | 100W | 4 | 400Wh |
| Fridge | 50W | 24 | 1,200Wh |
| Laptop | 60W | 3 | 180Wh |
| TV | 100W | 2 | 200Wh |
| Total | 1,980Wh/day |
If you use ~2,000Wh per day, you need:
- ~400–600W solar (depending on sunlight conditions)
- 200–300Ah lithium battery minimum
Sun exposure varies, so build in margin.
Step 2: Choosing the Right RV Solar Panels
Monocrystalline vs Polycrystalline
Monocrystalline:
- Higher efficiency
- Better in limited roof space
- Slightly more expensive
Polycrystalline:
- Lower cost
- Slightly less efficient
For most RV roofs, monocrystalline panels are preferred due to limited space.
Roof-Mounted vs Portable Solar Panels

Roof-Mounted Panels
- Always charging
- No setup required
- Ideal for full-time RVers
Portable Panels
- Can park in shade
- Flexible placement
- Good for weekenders
Many RV owners use both.
Step 3: Battery Bank & Battery Capacity
Your battery bank determines how long you can camp without sun.
Lead-Acid
- Cheaper
- Only ~50% usable capacity
- Shorter lifespan
AGM
- Sealed
- Maintenance-free
- Moderate lifespan
Lithium (LiFePO4)
- 80–100% usable capacity
- Lightweight
- 3,000–5,000+ cycles
- Higher upfront cost, lower long-term cost
Example:
200Ah lithium battery at 12V:
200Ah × 12V = 2,400Wh usable
Two batteries = ~4,800Wh usable
A battery monitor (Victron or similar) is strongly recommended.
Step 4: Charge Controller & Wiring
PWM vs MPPT
PWM:
- Budget-friendly
- Good for small systems (<400W)
MPPT:
- 15–30% more efficient
- Better in cold climates
- Ideal for 400W+ systems
For most RV solar setups over 400W, MPPT is worth it.
Wiring & Safety Essentials
This is where authority matters.
- Use correct gauge wire (typically 8–10 AWG for panel runs depending on amps)
- Fuse within 7 inches of battery positive terminal
- Use bus bars for clean power distribution
- Install a battery disconnect switch
- Use a proper roof gland for cable entry
- Seal roof penetrations with RV-rated sealant
Always disconnect batteries before wiring.
Step 5: Installing the Inverter
A pure sine wave inverter is essential for modern electronics.
Common sizes:
- 1,000W: Basic outlet use
- 2,000W: Microwave + appliances
- 3,000W: Larger loads & AC surge handling
Install inverter close to batteries to reduce voltage drop.
Use heavy gauge cables (2/0 or 4/0 depending on inverter size).
Can Solar Power Your RV Air Conditioner?
This is the big question.
Let’s do real math.
Typical RV AC unit:
- Running wattage: 1,500–2,000W
- Startup surge: 3,000–3,500W
If AC runs 4 hours per day:
2,000W × 4 hours = 8,000Wh
To support that:
You need:
- 600–800Ah lithium battery (minimum)
- 800–1,500W solar
- 3,000W inverter minimum
- Soft start installed on AC
This setup can cost $5,000–$10,000+.
Most RV solar systems are not designed for full AC operation.
Solar is ideal for:
- Lights
- Fridge
- Electronics
- Fans
- Charging devices
Air conditioning is a major upgrade tier.
Example RV Solar System Builds
Weekend Boondocker
- 400W solar
- 200Ah lithium
- 40A MPPT
- 2,000W inverter
- Cost: ~$2,000–$3,000
Full-Time Off-Grid
- 800–1,200W solar
- 400–600Ah lithium
- 60A MPPT
- 3,000W inverter
- Cost: ~$4,000–$7,000
AC-Capable Setup
- 1,200W+ solar
- 600–800Ah lithium
- 100A MPPT
- 3,000–4,000W inverter
- Soft start on AC
- Cost: $6,000–$10,000+
Total Cost Breakdown
Typical component ranges:
- Solar panels: $200–$350 each
- Lithium batteries: $600–$1,200 each
- MPPT controller: $200–$600
- Inverter: $400–$1,500
- Wiring & hardware: $200–$500
DIY saves thousands. Professional installs add $1,000–$3,000.
Is RV Solar Worth It for You?
Solar makes the most sense if you:
- Boondock regularly
- Avoid crowded RV parks
- Want quiet camping
- Stay on private land without hookups
- Work remotely
Solar may not be necessary if you:
- Stay mostly at full-hookup parks
- Camp only occasional weekends
- Rarely leave shore power
Solar increases where you can park — not just how long you can stay.
Final Thoughts: Building a System That Fits Your RV
Solar isn’t about slapping panels on your roof.
It’s about designing a power system that matches:
- Your travel style
- Your electrical habits
- Your camping preferences
- Your long-term plans
A properly sized RV solar setup creates:
- Generator-free mornings
- Longer off-grid stays
- More flexible travel routes
- Less reliance on crowded campgrounds
When your power system is dialed in, your travel flexibility expands dramatically — especially if you enjoy dispersed camping or staying in places without hookups.
Solar isn’t just panels.
It’s independence.

