
Winterizing an RV is one thing. Winterizing an RV property is bigger.
If you host RVers on private land, you’re protecting utilities and infrastructure that have to survive freezing temperatures, snow and ice, and the kind of winter weather that can knock out power when you need it most.
This guide is written for hosts and property owners who want a clear, practical winterization process: what to do, what order to do it in, and what to document so you can reopen smoothly when the camping season returns.
Quick note: every RV, travel trailer, and water system is a little different. Consult your owner’s manual where it applies, and follow the manufacturer’s instructions for any appliance, valve, or heater you touch.
Key Takeaways
- Start with water. Most winter damage comes from water lines freezing and expanding.
- Decide your operating mode early: staying open for winter months or fully winterized and closed.
- Use layered protection: drain, insulate, add heat where needed, and monitor.
- Plan for outages. A property can be winterized and still fail if heat goes off.
- De-winterize with the same care you winterize. Spring leaks are common when you rush.
Protect the water system first (spigots, lines, tanks, and drains).
If you do one thing, do this: prevent the pipes from freezing.
Choose your winter mode: open, limited, or closed.
- In the open and hosting mode, you will keep water flowing, protect exposed water pipes, and use heat tape or a heated water hose as needed.
- Limited service: you may keep electric hookups available but turn off water and ask guests to use their fresh water tank.
- Closed and winterized: you drain the water, blow out the lines, and add antifreeze where needed.
Your mode determines everything else.
Winterize the spigot and any exterior plumbing.
Exterior spigots are the first to freeze.
- Turn off water at the source if you can.
- Disconnect any hose and store it.
- Open the faucet to relieve pressure.
- If you have water lines in an exposed utility box, insulate and add an extra layer of protection against wind.
If you’re staying open, consider requiring guests to use a heated water hose and to disconnect during extreme cold temperatures.
Drain and protect water lines, valves, and low-point drains.
A lot of damage happens at the lowest points.
- Locate low-point drains and open them.
- Open all faucets (sink and shower included) so air can move through the plumbing system.
- If your setup supports it, blow out the lines with an air compressor. Use the correct pressure and fittings.
If you’re using RV antifreeze, use the type intended for RV winterization, and use it in the right places. Adding antifreeze is not a substitute for draining.
Water heaters and water tanks
If your property has a dedicated water heater for a bathhouse or utility room, treat it like a home appliance: shut it down safely, drain the water heater, and protect the surrounding area from freezing temps.
For any on-site water tanks or holding tanks:
- Drain what you can.
- Insulate exposed surfaces.
- If you must keep them active, consider heated tanks or a controlled heat source in the enclosure.
Black and gray considerations
If you have a dump station or any black and gray plumbing on-site, treat it as high risk.
- Standing liquid freezes.
- Valves can freeze shut.
If the property stays open, set clear rules for guests: dump quickly, don’t leave hoses connected, and keep the area clean.
Protect power and heat (and plan for outages).
Winterizing is not just plumbing. It’s keeping the site stable when the temperature drops.
Heat sources: propane, electric, and safety
If you heat any enclosed utility space, do it safely.
- If you use propane, confirm the propane tank is secured, protected, and serviced.
- If you use a space heater, use a model with tip-over protection and keep it away from combustibles.
For winter safety guidance, the CDC’s winter weather resources are worth reading, especially around safe heating and carbon monoxide risk.
Monitor temperature where it matters.
A property can look fine and still freeze in a utility box.
- Put a thermometer or sensor near water lines.
- Check the heater runs during cold snaps.
- If you live in an area with frequent outages, plan backup power or a shutdown protocol.
FEMA’s winter weather checklist is a useful baseline for outage planning:
Protect structures and the site from wind, moisture, and snow load..
Skirting and wind control
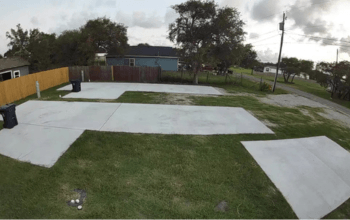
If you have an RV pad with permanent hookups, a skirt or windbreak can reduce heat loss around exposed plumbing.
Even a simple barrier can keep your rig protected when wind is the main problem.
Moisture management: allow for air circulation.
Winter storage creates a moisture trap.
- Allow for air circulation in enclosed spaces.
- Use a dehumidifier in utility rooms if power is reliable.
- Do a thorough cleaning before storing your RV or closing a guest area.
Insulation and weatherization
If you have a bathhouse, laundry room, or small office, basic weatherization helps protect pipes and lower heating demand.
The U.S. Department of Energy’s weatherization guidance is a solid reference for insulation and air sealing concepts:
The snow and ice plan
- Keep paths safe.
- Protect pedestals and utility boxes from plow damage.
- Mark shutoffs so you can locate them in a storm.
Protect against pests and hidden damage.
Cold temperatures push pests inside.
Rodent prevention
- Seal gaps around penetrations.
- Use steel wool where appropriate around small openings.
- Store supplies in sealed bins.
Check weekly if you live full-time on the property.
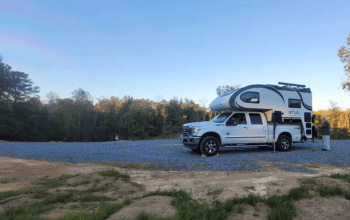
RV cover and storage notes
If you are storing your camper or requesting that guests store it on-site, please follow these guidelines:
- Use an RV cover that fits and is strapped to handle wind.
- Keep vents clear.
- Avoid trapping moisture against the exterior.
De-winterize: reopen without surprises.
De-winterizing is where many properties spring a leak.
- Reconnect water slowly.
- Pressurize in stages.
- Check every valve and faucet.
- Flush the system before guests arrive.
If you used a cup of antifreeze in traps or drains, flush until clear.
Winterizing your RV property is about protecting the parts you can’t replace quickly: water lines, valves, utility boxes, and the systems that keep your campground experience safe.
At HookHub, we see how much trust a winterized listing builds. When hosts describe their winterization steps, winter months availability, and what guests should bring (like a heated water hose), RVers can plan smarter and avoid preventable damage.

